The motorized fold-curtain system should be installed by a qualified person while observing all safety regulations that are common for working on electrical installations.
Although the basic idea is to control it from a home automation system, it is also perfectly possible to operate the system using typical roller blind switches.
By following the steps described below, the installation and calibration will proceed smoothly. Depending on the model ordered, the motor can be a 24VDC, or 230VAC version.
The motorized fold-curtain system consists of an aluminum box profile where inside all the operating items are mounted. The system is supplied with a motor, corded roller drums, mounting brackets, and hard velcro "hook" across the entire width (see "confection" for instructions on the curtain fabric itself, which is not included), all mounted and ready to be installed.
See here how the system looks like. The items that are not included are part of the textile confection. The confection store will know how large the hems should be to accept the rods and weight bar. The instructions for the confection are explained in the confection section of this document.

The upper and lower end positions must be mechanically adjusted. Upon delivery, they are set to a maximum of 1 revolution of the shaft. This avoids the risk of uncontrolled winding or unwinding. The adjustment procedure is further explained in this document.
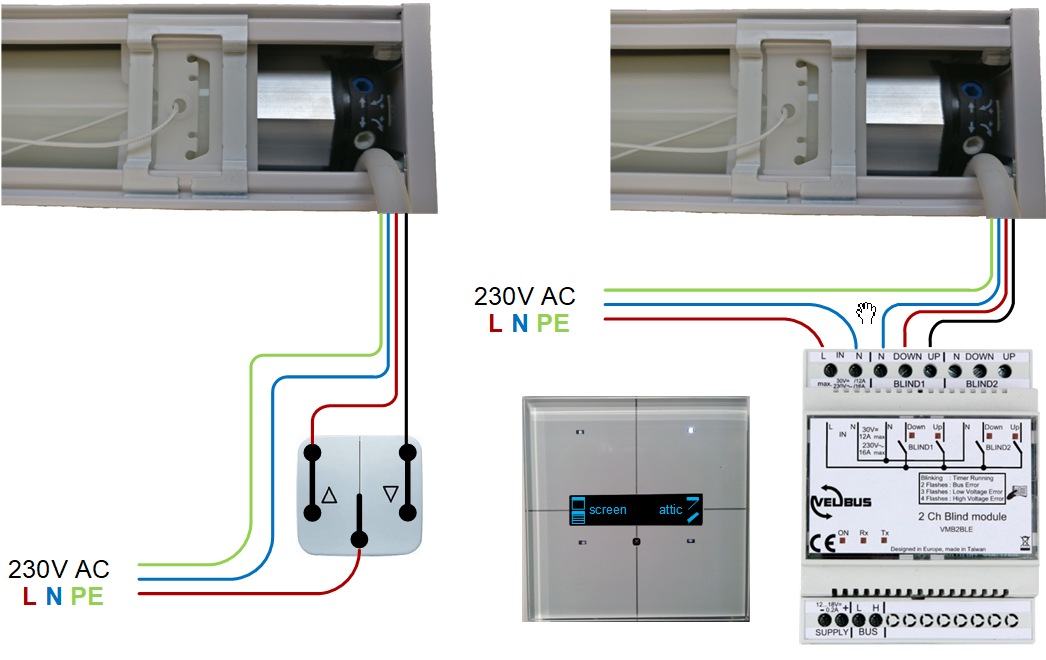
Motor connection is as follows :
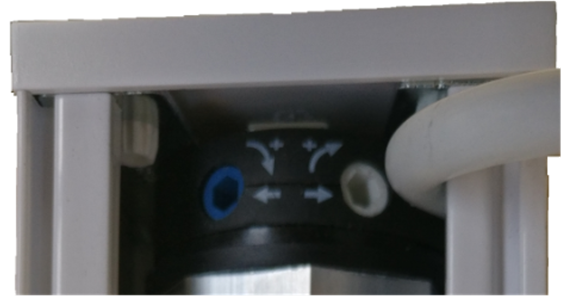
Motor end position adjustment knobs : two potentiometers to be set with a 4mm hex key. Turning in the direction of the plus sign = extending, turning in the direction of the minus sign = shortening
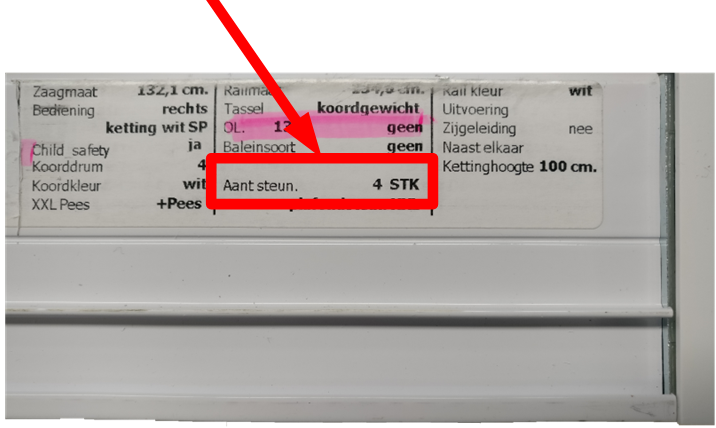
The system is delivered with the correct number of mounting brackets for wall and/or ceiling mounting. All brackets should be used, one at about 10cm of each end, and the others evenly distributed. The number of brackets is printed on the label on the back of the profile.
![]() It is absolutely necessary to mount the system leveled. This is a critical success factor for the whole working capabilty of the system. Use the right tools, such as a laser with spirit level, to check the level, never trust any other visual aid.
It is absolutely necessary to mount the system leveled. This is a critical success factor for the whole working capabilty of the system. Use the right tools, such as a laser with spirit level, to check the level, never trust any other visual aid.

If possible, stay about 3mm lower than the ceiling with the top level of the bracket when using wall mounting. This relief is usefull to ease the fixing and removing of the system in the brackets.
Once you have fixed the brackets you can click the box profile on the brackets. For this, proceed as follows :

Then you push the box profile towards the wall and ceiling untill it secures and clicks in the back of the brackets.
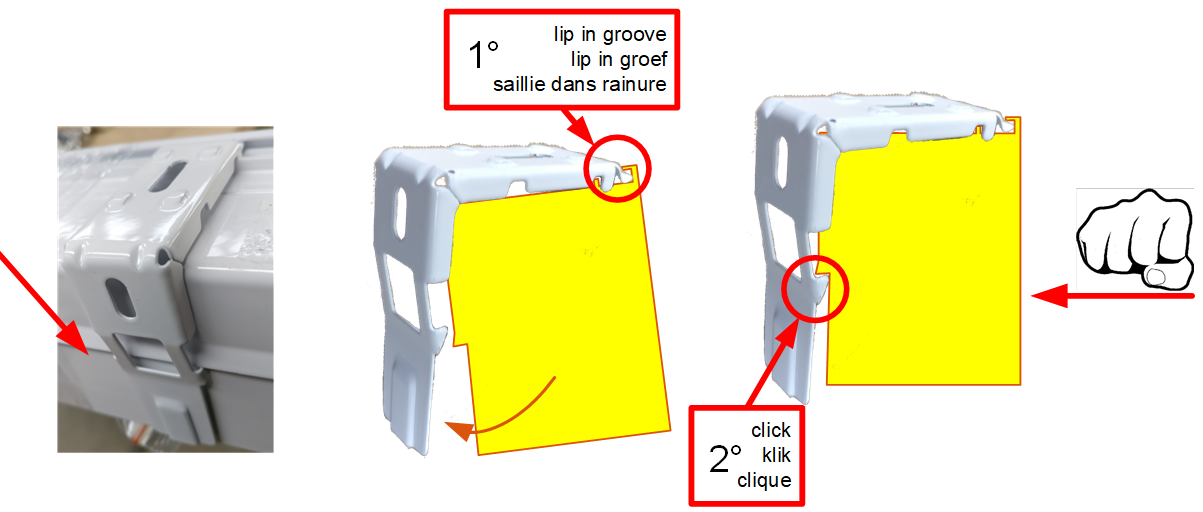
Push firmly with your fist at the front of the box profile with a few knocks at the level of each bracket to ensure that all brackets are properly locked. You should hear the locking click.
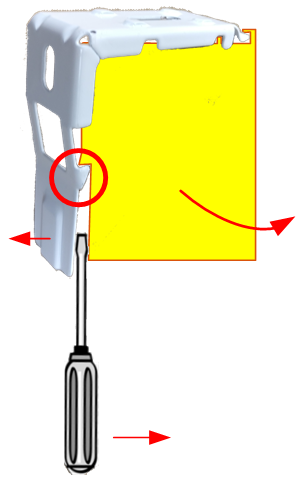
If it should be necessary to remove the box profile from the brackets, then you must release the lock by using a flat screwdriver.
Now you can proceed to the electrical connection of the system.
![]() Safety first. Ensure that the circuit breaker is put in the off position, do not connect the system on a live circuit. It is not safe in the first place, but it can harm you also if the motor would start to run because of wrong connection.
Safety first. Ensure that the circuit breaker is put in the off position, do not connect the system on a live circuit. It is not safe in the first place, but it can harm you also if the motor would start to run because of wrong connection.
You need to choose and purchase the curtain fabric / textile from a drapery or interior store that can also provide custom-made curtains according to the description provided.
Once you have made a choice regarding the fabric for your curtain (color, texture, transparency, look), the assembly must be done, and you should take into account the following guidelines:
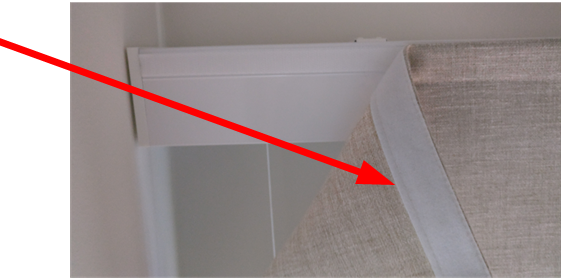
At the top, a 20mm Velcro "loop" must be stiched across the entire width.
At regular intervals (every 25 to 30 cm), seams should be provided across the entire width in which rods must be inserted. At each end, a buttonhole should be provided to be able to remove the rods if the curtain needs to be cleaned. The rods should be provided by the store, usually it is a small aluminum tube (diameter approximative 7mm) which is preferred to a nylon or plastic one because of its rigidity. The rods should cover the entire width of the curtain, minus 3cm to avoid that it becomes visible.
Sometimes there might be an extra cord drum mounted inside the box profile. If you feel that it is not needed, then just don't use the cord. The cord drums can easily be slided into the required position, just leave the unused cord drum somewhere between the others, but remove the nylon cord so that it doesn't interfere with the others and don't risk to cause mechanical issues.
Additionally, a small ring needs to be attached to the seam through which the cord is threaded. On the last cord seam, choking rings or clamp rings should be provided to tie the threads to.
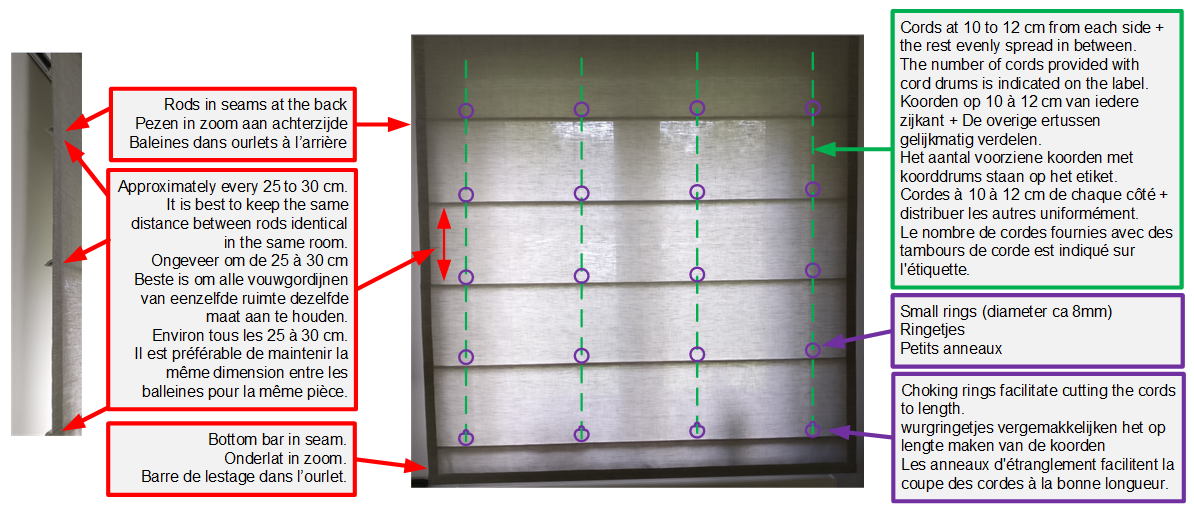
At the bottom, a wider seam must be provided for a weight bar, also with a wider buttonhole to be able to remove it when cleaning of the curtain is needed.
If the curtain fabric cannot be assembled in one piece, then the different sections should be sewn together at the cord seam.
Rods, bottom bar, and rings should be provided by the confection store.
Start by sliding the cord drums (together with the cord guide clip) to the right position. To do this, measure on the curtain where the rings are located.
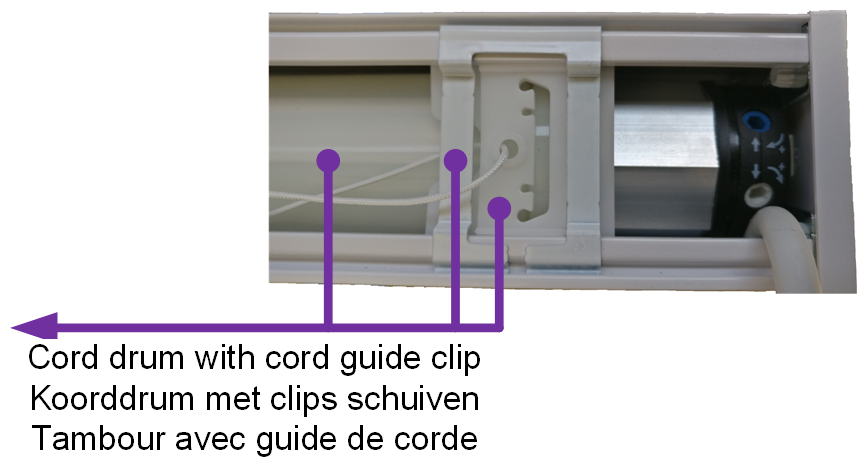
If a cord drum is not being used, you must fully detach the cord from the drum and remove it. The cord drum itself can remain in place.
Thread each cord through all the rings and temporarily attach the cord to the bottom ring (choking ring).
Bring the top of the curtain upwards and fasten theVelcro onto the box profile system. Ensure even pressure without stretching or wrinkling the fabric. Before applying the Velcro, hold the curtain in front of the box profile over its entire width. By doing so, you'll see how much you need to stretch the fabric or not. Best is to do this with two persons.
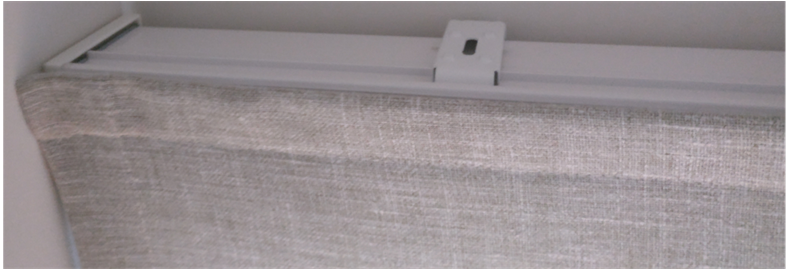 here there has been too much stretcing of the fabric, remove the curtain from the Velcro and start over with less tension.
Let the curtain hang. Check that all cords have equal tension and adjust as necessary.
Now you need to make the motor turn about three revolutions so that the cords are rolled up several times on the cord drums.
Insert the hexagon tool into one of the adjustment ports and turn it in the direction of the plus sign. If you do not see any motor movement after half a turn, you probably have the wrong adjustment port, so try the other one.

Determine the direction of rotation. This will be the "upward" direction of rotation. If it is incorrect, you need to swap the brown and the black conductors. To do this, don't forget to switch off the circuit breaker.
Now this is the lowest position and your curtain should hang completely unfolded. Adjust the cord length and ensure that all cords have the same tension. The curtain should now also hang completely horizontal (leveled).
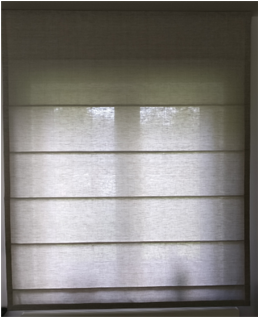
Now you need to set the highest position. Insert the hex tool into the same control bus and give the "up" command in your home automation and turn the hex tool in the plus direction until the top position is reached.
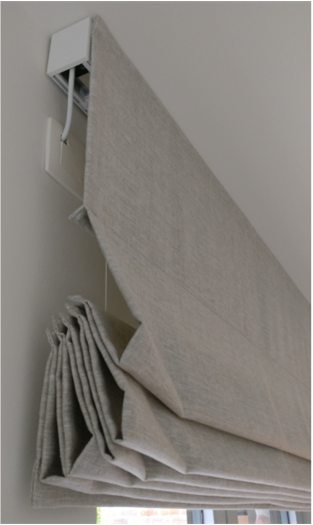 folds during initial mounting
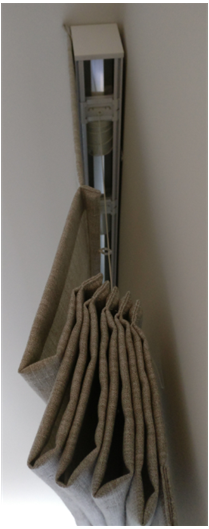 the folds will fall into place after a few days
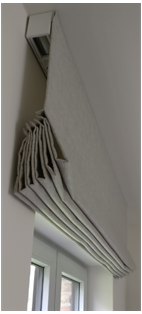
Do not go too high, there must be a minimum clearance so that the motor never gets blocked.
From now on, you can determine the position between 0 and 100% via your home automation. Since the end positions are now set, the motor will never be able to go beyond the end stops and your motorized fold-curtain system can be safely put into use. The folds will settle into the right creases after a few days.
Calculate how much time your home automation needs to give an "up" / "down" command to operate your fold-curtain system from 0 to 100%.